
Quick Answer
Oven temperature calibration corrects temperature inaccuracies of up to ±35°F through control panel adjustments or thermostat tuning. Test your oven using a quality thermometer at 350°F—if the reading differs by 15°F or more, calibration is needed. Most modern ovens allow DIY calibration through digital menus, costing nothing. Professional calibration ($100-$200) is necessary for offsets exceeding 50°F or when DIY adjustments fail to correct the problem.
At-a-Glance: Oven Calibration Essentials
DIY Calibration Range
±35°F adjustment possible
Testing Cost
$15-$30 (oven thermometer)
Professional Service
$100-$200 (calibration only)
Thermostat Replacement
$200-$400 (parts + labor)
Testing Time
45-60 minutes (multiple temps)
Calibration Frequency
Annually or as needed
Signs Your Oven Temperature Is Off
Recognizing temperature inaccuracy early prevents cooking disasters and wasted ingredients. Most home cooks don't realize their oven temperature is incorrect until persistent problems emerge across multiple recipes and cooking attempts.
Common Indicators of Temperature Problems
1. Consistent Undercooking or Overcooking: If recipes consistently require 10-15 minutes more or less than specified cooking times, your oven temperature likely differs from the set value. This pattern appears across all recipes, not just specific dishes.
2. Uneven Browning: Temperature inaccuracy often manifests as uneven coloring on baked goods. Cookies burn on the bottom while remaining pale on top, bread develops dark crusts before the interior fully cooks, or casseroles brown excessively before heating through. These symptoms indicate not just incorrect temperature but potentially uneven heat distribution.
3. Baking Failures: Delicate baked goods serve as excellent temperature indicators. Cakes that sink in the middle, soufflés that refuse to rise, macarons with no feet, and breads with poor texture all suggest temperature problems. These items require precise temperatures for proper chemical reactions.
Temperature-Sensitive Recipes
These recipes are particularly sensitive to temperature variations and will fail with ±25°F errors:
- Meringues and Pavlovas: Require exact 200-225°F for proper drying
- Soufflés: Need precise 375°F for rise without burning
- Macarons: Demand 300°F ±5°F for proper feet formation
- Cheesecakes: Require exact 325°F to prevent cracking
- Custards: Need low, consistent 300-325°F for smooth texture
- Artisan Bread: Requires specific temperatures for crust development
4. Extended Cooking Times: When every recipe takes significantly longer than specified—adding 15-20 minutes to standard cooking times—your oven runs cooler than indicated. This increases energy costs and impacts food quality.
5. Burnt Exteriors with Raw Interiors: This frustrating problem indicates oven temperature exceeds the dial setting. Foods cook too quickly on the outside while interiors remain underdone. Roasts, casseroles, and large baked items show this symptom most clearly.
Quantifying Temperature Accuracy
Professional standards define acceptable temperature accuracy ranges:
- Excellent: ±5°F (professional-grade ovens)
- Good: ±10°F (high-end residential ovens)
- Acceptable: ±15°F (standard residential ovens)
- Poor: ±25°F (needs calibration)
- Unacceptable: ±35°F+ (requires professional service)
Most home ovens perform in the "acceptable" range when new but drift toward "poor" as thermostats age. Regular testing catches this drift before it impacts cooking significantly.
Temperature Fluctuation vs Static Inaccuracy
Understanding the difference between temperature fluctuation and static offset helps diagnose problems accurately.
Normal Fluctuation: All ovens cycle heating elements on and off, creating temperature swings. Electric ovens fluctuate ±10-15°F around the set point, while gas ovens show larger swings of ±25-30°F. This is normal thermostat behavior.
Static Offset: The average temperature consistently differs from the setting. An oven set to 350°F that averages 375°F has a +25°F offset requiring calibration, even if fluctuation range remains normal.
Excessive Fluctuation: Temperature swings exceeding ±30°F in electric ovens or ±50°F in gas ovens indicate control problems beyond simple calibration. These require professional diagnosis of thermostat, control board, or heating element issues.
DIY Testing Methods
Equipment Required
Accurate temperature testing requires proper equipment. Investment in quality testing tools pays dividends through precise calibration and improved cooking results.
Oven Thermometers:
- Analog Dial Thermometers: $10-$20, accurate to ±10-15°F, basic functionality
- Digital Hanging Thermometers: $15-$30, accurate to ±5-10°F, easier reading
- Professional Leave-In Thermometers: $30-$60, accurate to ±2-5°F, recommended
- Dual-Sensor Thermometers: $40-$80, monitors two locations simultaneously
Thermometer Calibration Warning
Test your oven thermometer's accuracy before relying on readings. Place it in boiling water (212°F at sea level) or ice water (32°F). If readings differ by more than 5°F, purchase a more accurate thermometer or note the offset for manual correction.
Basic Temperature Testing Procedure
This standard test establishes your oven's temperature accuracy across its operational range.
Step 1: Preparation
- Remove all racks except the middle one
- Place oven thermometer in the center of the middle rack
- Ensure thermometer doesn't touch oven walls or racks
- Position so you can read it through the oven window (avoid opening door)
Step 2: Testing at 350°F
- Set oven to exactly 350°F
- Allow 20-minute preheat (15 minutes after preheat signal)
- Extra preheat time ensures complete heat saturation
- Record thermometer reading without opening door
- Wait 5 more minutes and record second reading
- Average the two readings for accurate assessment
Step 3: Multi-Temperature Testing
Test at three temperatures for complete accuracy profile:
- 250°F: Low-temperature baking and roasting
- 350°F: Standard baking temperature
- 450°F: High-heat roasting and pizza
Different temperature ranges may show different offset patterns. An oven might read accurately at 350°F but run hot at 450°F, indicating non-linear calibration issues.
Advanced Testing: Temperature Profiling
Professional-level testing creates a complete temperature profile showing accuracy across the full range and identifying hot/cold spots.
Multi-Zone Testing:
- Use three thermometers simultaneously
- Place one each: front center, back center, and middle center
- Test at 350°F for 30 minutes
- Record readings every 5 minutes
- Compare readings to identify hot/cold zones
Temperature variations exceeding 25°F between zones indicate convection fan problems, insulation issues, or heating element failures beyond simple calibration fixes.
Sugar Calibration Test (Alternative Method)
For those without thermometers, this old-school method provides approximate temperature verification.
Materials Needed:
- 5 tablespoons white sugar
- 5 small oven-safe dishes or aluminum foil packets
- Timer
Procedure:
- Place 1 tablespoon sugar in each container
- Preheat oven to 350°F (20 minute preheat)
- Place all containers on middle rack
- Start timing immediately
- Check sugar every 5 minutes
Results Interpretation:
- Sugar melts at 15-20 minutes: Oven accurate (350°F)
- Sugar melts before 15 minutes: Oven runs hot
- Sugar not melted after 25 minutes: Oven runs cool
- Sugar burns or caramelizes: Oven significantly too hot
Testing Frequency Recommendations
Annual Testing: All ovens should be tested once yearly as preventive maintenance.
Bi-Annual Testing: Heavy users (daily baking) should test every 6 months.
Immediate Testing: Test after moving the oven, electrical work in your home, consistent cooking problems, or after repairs to heating/control systems.
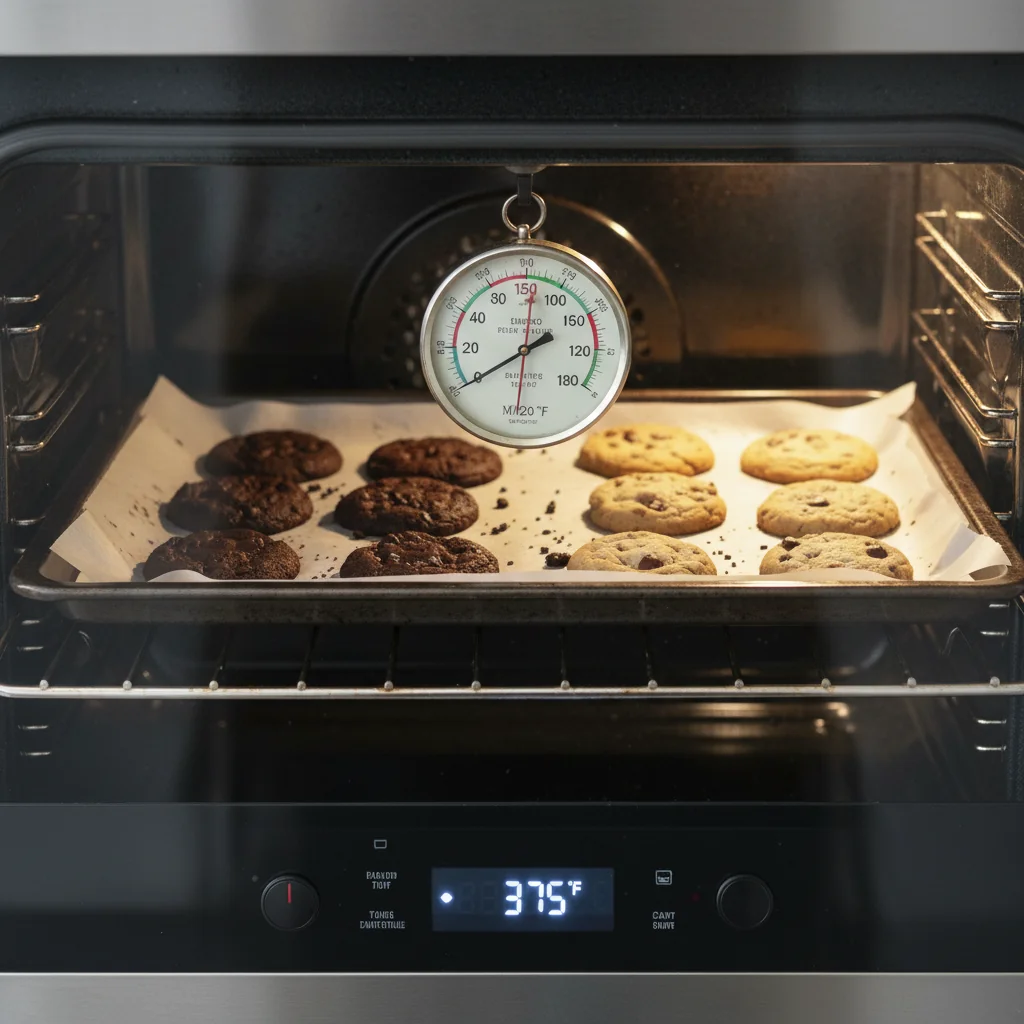
Calibration Process Step-by-Step

Modern oven control panel displaying calibration settings for precise temperature adjustment
Electronic Oven Calibration (Digital Controls)
Modern ovens with digital displays typically include built-in calibration menus. The process varies by manufacturer, but general principles remain consistent.
General Electronic Calibration Procedure:
Step 1: Access Calibration Mode
Common access methods by manufacturer:
- GE/Hotpoint: Press and hold "Bake" and "Broil Hi/Lo" simultaneously for 3 seconds
- Whirlpool/KitchenAid: Press "Bake" for 5 seconds until "0" appears
- Samsung: Press and hold "Timer" and "+" buttons for 3 seconds
- LG: Press "Bake" three times, then "Start" within 5 seconds
- Frigidaire: Press "Bake" and hold for 5 seconds
- Bosch: Press "Clock" and "-" simultaneously until "CAL" appears
Consult Owner's Manual
Always reference your specific model's owner's manual for exact calibration procedures. Incorrect button sequences can trigger diagnostic modes or accidentally change settings. Owner's manuals are available online by searching your model number.
Step 2: Enter Temperature Offset
- Display shows current offset (usually "0" or "+/-00")
- Use "+" or "-" buttons to adjust offset
- Each press typically changes offset by 5°F or 10°F
- Maximum adjustment range: usually ±35°F
- If your oven reads 375°F when set to 350°F, enter "-25"
- If your oven reads 325°F when set to 350°F, enter "+25"
Step 3: Save and Exit
- Press "Start" or "Enter" to save changes
- Display returns to normal mode
- New offset takes effect immediately
- No power cycling required
Step 4: Verification Testing
- Wait 30 minutes after calibration before testing
- Test at 350°F using same procedure as initial testing
- Verify thermometer reading matches 350°F (±10°F acceptable)
- Fine-tune calibration if necessary
- Retest at 250°F and 450°F to confirm accuracy across range
Mechanical Thermostat Calibration (Older Ovens)
Older ovens with mechanical thermostats require physical adjustment of internal components. This process demands more care and mechanical aptitude.
Safety First
Disconnect power at the circuit breaker before accessing any internal oven components. Mechanical thermostat adjustment involves opening the control panel and working near electrical connections. Improper handling can cause electric shock or damage control systems. Consider professional service if uncomfortable with electrical work.
Mechanical Calibration Procedure:
Step 1: Locate Thermostat
- Remove oven door for easier access (if necessary)
- Remove control panel screws (usually behind or under control knobs)
- Carefully pull control panel forward
- Locate thermostat assembly behind temperature control knob
- Identify calibration screw (small brass or steel screw inside thermostat shaft)
Step 2: Adjust Calibration Screw
- Use small flathead screwdriver (typically 1/8" width)
- Each 1/8 turn changes temperature approximately 10°F
- Clockwise rotation typically increases temperature
- Counterclockwise rotation typically decreases temperature
- Make small adjustments (1/8 turn at a time)
- Note starting position for reference
Step 3: Reassembly and Testing
- Reassemble control panel carefully
- Ensure all wiring remains connected
- Replace control knobs in proper position
- Restore power at circuit breaker
- Test temperature as described in testing section
- Repeat adjustment if necessary
Gas Oven Calibration Considerations
Gas ovens present unique calibration challenges due to flame-based heating and mechanical controls.
Gas Oven Specific Issues:
- Temperature fluctuations are larger (±25-30°F normal)
- Flame color indicates proper gas-air mixture (blue flame optimal)
- Yellow or orange flames suggest combustion problems requiring service
- Gas pressure affects temperature accuracy (requires professional adjustment)
- Burner orifices may need cleaning if flame is weak
Gas oven calibration beyond thermostat adjustment requires professional service to ensure safe operation and proper combustion.
Electronic vs Mechanical Thermostats
Electronic Thermostat Systems
Modern electronic thermostats use temperature sensors and digital control boards for precise temperature management.
Components:
- Temperature Sensor/Probe: Resistance temperature detector (RTD) or thermocouple measuring actual cavity temperature
- Control Board: Microprocessor interpreting sensor data and controlling heating elements
- User Interface: Digital display and control panel
- Power Relay: Switches heating elements or gas valve on/off
Advantages:
- Precise temperature control (±5-10°F typical)
- Easy digital calibration through control panel
- Multiple temperature sensors possible
- Programmable cooking functions
- Better temperature stability
- Faster preheat times
Disadvantages:
- More expensive to repair ($200-$400 for control board)
- Electronic components fail from power surges
- Requires specific manufacturer parts
- DIY repair more difficult
- Sensitive to moisture and heat damage
Mechanical Thermostat Systems
Older mechanical thermostats use bi-metal strips or gas-filled bulbs that expand/contract with temperature changes.
Components:
- Bi-Metal Coil or Gas Bulb: Mechanical sensor responding to temperature
- Switch Mechanism: Opens/closes electrical contacts based on sensor position
- Calibration Adjustment: Physical screw altering switch point
- Temperature Dial: Mechanical linkage to sensor assembly
Advantages:
- Simple, reliable design
- Less expensive to repair ($100-$200)
- More DIY-friendly
- No power surge vulnerability
- Universal parts often available
- Long service life (20+ years possible)
Disadvantages:
- Less precise temperature control (±15-20°F typical)
- Drift over time requires periodic calibration
- Physical calibration adjustment needed
- Slower response to temperature changes
- Limited to basic functionality
Thermostat System Comparison
| Feature | Electronic | Mechanical |
|---|---|---|
| Temperature Accuracy | ±5-10°F | ±15-20°F |
| Calibration Method | Digital menu | Physical screw |
| Calibration Cost | DIY: Free | DIY: Free |
| Replacement Cost | $200-$400 | $100-$200 |
| Service Life | 8-12 years | 15-25 years |
| DIY Friendliness | Moderate | Good |
| Power Surge Risk | High | None |
Temperature Probe Testing
Understanding Temperature Probes
Electronic ovens use temperature probes (sensors) to measure cavity temperature. These probes are critical to accurate temperature control, and failure or drift causes calibration problems that software adjustment cannot fix.
Probe Types:
- RTD (Resistance Temperature Detector): Most common in modern ovens, changes electrical resistance with temperature
- Thermocouple: Generates voltage proportional to temperature, used in some gas ovens
- Thermistor: Semiconductor-based sensor, provides accurate readings
Testing Temperature Probe Accuracy
A malfunctioning probe cannot be corrected through calibration and requires replacement. Testing probe function helps determine if calibration or replacement is needed.
Visual Inspection:
- Locate temperature probe (usually mounted on upper rear or side wall)
- Check for physical damage: cracks, corrosion, burn marks
- Inspect wiring connections for looseness or corrosion
- Look for signs of moisture damage or grease buildup
- Ensure probe hasn't been bent or pushed back through mounting hole
Resistance Testing (RTD Probes):
Requires multimeter with ohm (Ω) measurement capability:
- Disconnect power at circuit breaker
- Access temperature probe connections
- Disconnect probe wires from control board
- Set multimeter to resistance (ohms) mode
- Measure resistance across probe terminals at room temperature (68-70°F)
- Compare reading to manufacturer specifications (typically 1000-1100 ohms at 70°F)
- Significant deviation (±200 ohms) indicates probe failure
Electrical Testing Safety
Always disconnect power before testing electrical components. Multimeter testing should only be performed by those comfortable with electrical work. Incorrect testing can damage control boards or create shock hazards. When in doubt, contact professional service.
Common Probe Failure Modes
1. Drift: Probe resistance changes over time due to age, causing gradual temperature inaccuracy. Drift of 50-100 ohms translates to 15-30°F temperature errors. This is the most common probe failure and develops slowly over 5-8 years.
2. Open Circuit: Complete probe failure shows infinite resistance on multimeter. Oven displays error codes and refuses to heat. Requires immediate probe replacement.
3. Short Circuit: Damaged insulation causes probe to read zero or very low resistance. Oven may display error codes or show extreme temperature readings (9999°F or similar). Requires immediate replacement for safety.
4. Intermittent Connection: Loose or corroded connections cause erratic temperature readings and unpredictable oven behavior. Wiggling probe wires during operation reveals this issue (temperature reading changes or error codes appear).
Temperature Probe Replacement
Probe replacement is straightforward for those comfortable with basic appliance repair.
Replacement Procedure:
- Order correct replacement probe (use model number for exact match)
- Disconnect power at circuit breaker
- Access probe mounting (may require removing oven door or interior panels)
- Disconnect probe wiring from control board (photograph connections)
- Remove mounting bracket or clip holding probe
- Extract probe through mounting hole
- Install new probe in reverse order
- Ensure probe extends proper distance into oven cavity (per manufacturer specs)
- Secure all connections and mounting hardware
- Restore power and test operation
Replacement Costs:
- DIY Parts: $30-$80 (probe only)
- Professional Service: $150-$300 (parts + labor)
- Time Required: 30-60 minutes DIY, technician visit 1-2 hours including testing
When to Call Professionals
Situations Requiring Professional Service
While DIY calibration handles many temperature issues, certain situations demand professional expertise and specialized equipment.
1. Calibration Beyond Adjustment Range
If your oven temperature differs from the setting by more than 50°F, calibration adjustment won't correct the problem. This indicates component failure requiring diagnosis and replacement:
- Failed or drifted temperature probe
- Malfunctioning control board
- Weak or failing heating element
- Gas valve problems (gas ovens)
- Electrical supply issues
2. Calibration Doesn't Fix the Problem
After attempting calibration, if temperature accuracy doesn't improve or problems persist, underlying issues exist:
- Temperature sensor reading incorrectly
- Control board not processing calibration
- Multiple failing components
- Wiring or connection problems
3. Extreme Temperature Fluctuations
Fluctuations exceeding ±30°F in electric ovens or ±50°F in gas ovens indicate control system problems:
- Failing thermostat or control relay
- Heating element short cycling
- Gas valve issues
- Control board malfunction
4. Error Codes or Display Problems
Electronic ovens displaying error codes related to temperature sensing require professional diagnosis:
- F1, F2, F3 codes (vary by manufacturer)
- Temperature sensor errors
- Control board communication failures
- Display showing erratic temperature readings
5. Gas Oven Specific Issues
Gas appliance problems require certified technicians due to safety concerns:
- Yellow or orange flames (improper combustion)
- Gas smell during operation
- Flame won't stay lit
- Excessive soot buildup
- Gas pressure adjustment needed
Gas Appliance Safety
Never attempt gas valve adjustment or gas line work yourself. Gas appliances require certified technicians for safety and legal compliance. Improper gas work creates fire hazards, explosion risks, and carbon monoxide danger. Contact licensed gas technicians for all gas oven repairs beyond basic cleaning.
What Professional Service Includes
Professional oven calibration service goes beyond simple adjustment, providing comprehensive assessment and precision correction.
Complete Professional Service:
- Precision Testing: Calibrated instruments accurate to ±1°F
- Multi-Point Temperature Profiling: Testing at 5-7 temperature points throughout range
- Component Inspection: Visual and electrical testing of all temperature control components
- Probe Testing: Resistance and response time measurement
- Heating Element Assessment: Current draw and heating capacity verification
- Control Board Diagnostics: Electronic testing of control circuits
- Calibration Adjustment: Precise correction to manufacturer specifications
- Verification Testing: Post-calibration testing at multiple temperatures
- Documentation: Written report of findings and corrections
Professional Service Costs
Toronto Professional Oven Calibration Costs
| Service | Cost Range | Includes |
|---|---|---|
| Diagnostic + Calibration | $100-$150 | Testing, adjustment, verification |
| Calibration + Probe Replacement | $180-$280 | Parts, labor, calibration, testing |
| Thermostat Replacement | $200-$350 | Parts, installation, calibration |
| Control Board Replacement | $300-$500 | Parts, programming, calibration |
| Gas Valve Adjustment | $150-$250 | Testing, adjustment, safety check |
| Complete Temperature Control Overhaul | $400-$700 | All components, complete system rebuild |
Choosing a Qualified Technician
Oven calibration requires expertise and precision equipment. Select technicians with specific qualifications:
Essential Qualifications:
- Factory training or certification from major manufacturers
- Calibrated testing equipment with current certification
- Experience with your oven brand and model type
- Gas appliance certification (if gas oven)
- Liability insurance and business licensing
- Written warranty on calibration work (typically 90 days-1 year)
Nika Appliance Repair Oven Calibration Services
Nika Appliance Repair provides professional oven calibration and temperature control services across Toronto. Our certified technicians use calibrated test equipment accurate to ±1°F and provide written verification of all temperature adjustments. We service all major brands and offer 1-year warranty on calibration work.
Schedule Service: (647) 490-0999
Baking Accuracy Importance
The Science of Temperature Precision
Baking is chemistry, and temperature serves as the catalyst for chemical reactions that transform ingredients into finished products. Understanding why accuracy matters helps appreciate the value of proper calibration.
Critical Chemical Reactions:
1. Leavening Reactions
Baking powder and baking soda require specific temperatures to release carbon dioxide gas effectively:
- Below 300°F: Insufficient activation, dense products
- 300-375°F: Optimal activation, proper rise
- Above 400°F: Too-rapid activation, irregular texture
2. Protein Coagulation
Eggs and gluten proteins set at precise temperatures:
- Egg whites: Begin setting at 144°F, fully coagulate at 158°F
- Egg yolks: Begin setting at 149°F, fully coagulate at 158°F
- Gluten: Strengthens 140-160°F, sets permanently above 160°F
Temperature variations of 25°F dramatically affect texture: custards curdle, cakes collapse, bread develops poor structure.
3. Maillard Reaction and Caramelization
Browning reactions create flavor and color:
- Maillard Reaction: Begins at 280°F, optimal at 300-350°F
- Caramelization: Sugar begins breaking down at 320°F
- Below optimal: Pale, flavorless results
- Above optimal: Burnt, bitter flavors
Impact on Specific Baked Goods
Bread:
- ±25°F affects oven spring (rapid initial rise)
- Crust development requires 400-450°F
- Internal temperature must reach 190-210°F for proper doneness
- Too low: Dense, gummy interior
- Too high: Burnt crust, raw center
Cakes:
- Require consistent 325-350°F for even rise
- ±15°F causes uneven layers, sunken centers
- Temperature fluctuations create texture problems
- Too low: Dense, fallen cakes
- Too high: Domed tops, dry texture
Cookies:
- Spread rate controlled by temperature (butter melting point)
- Optimal 350-375°F for most recipes
- ±20°F dramatically affects final shape and texture
- Too low: Thick, cake-like cookies
- Too high: Flat, crispy cookies with burnt edges
Pastries:
- Puff pastry requires exact 400-425°F for layers
- Temperature creates steam for lift
- ±15°F affects layer separation and flakiness
- Too low: Dense, greasy pastry
- Too high: Burnt exterior, raw interior
Professional Baking Standards
Commercial bakeries maintain strict temperature control because economics depend on consistency. Understanding professional standards highlights home calibration importance.
Commercial Temperature Requirements:
- Deck Ovens: ±5°F accuracy standard
- Convection Ovens: ±8°F acceptable
- Calibration Frequency: Monthly testing, quarterly professional calibration
- Multi-Zone Control: Different temperatures for top/bottom/sides
- Documentation: Every oven's temperature profile recorded
Home bakers achieving professional results require similar attention to temperature accuracy.
Cost Breakdown and Comparison
DIY vs Professional Calibration Cost Analysis
Comparing DIY and professional approaches helps determine the most cost-effective solution for your situation.
Complete Cost Comparison
| Approach | Initial Cost | Time Investment | Success Rate | Best For |
|---|---|---|---|---|
| DIY Electronic Calibration | $15-$30 (thermometer) | 1-2 hours | 85% (offset <35°F) | Modern ovens, minor offsets |
| DIY Mechanical Calibration | $15-$30 (thermometer) | 2-3 hours | 70% (requires skill) | Older ovens, mechanically inclined |
| Professional Calibration Only | $100-$150 | 1-2 hours (tech visit) | 95% | Any oven, guaranteed results |
| Professional with Probe Replacement | $180-$280 | 2-3 hours (tech visit) | 98% | Failed probes, large offsets |
| Complete System Replacement | $400-$700 | 3-4 hours (tech visit) | 99% | Multiple failures, old systems |
Hidden Costs of Inaccurate Temperature
Poor oven calibration creates ongoing costs that exceed professional calibration expenses:
Wasted Ingredients:
- Failed baking attempts: $10-$30 per failure
- Frequent home bakers waste $200-$400 annually
- Special occasion disasters particularly costly (wedding cakes, holiday meals)
- Learning recipe modifications consumes time and materials
Increased Energy Costs:
- Compensating for low temperature extends cooking times 15-30%
- Additional energy costs: $40-$80 annually for frequent users
- Preheating longer wastes energy
- Temperature fluctuations cause inefficient heating cycles
Appliance Lifespan Reduction:
- Faulty thermostats cause excessive heating element cycling
- Control boards stressed by temperature sensor errors
- Gas ovens with poor calibration waste fuel
- Premature component failure requiring expensive repairs
Total Annual Cost of Poor Calibration: $250-$500 for active bakers
Professional Calibration: $100-$150 every 2 years = $50-$75 annually
Net Savings: $175-$425 annually with proper calibration
When to Calibrate vs Replace
Age and condition determine whether calibration makes financial sense versus oven replacement.
Calibrate If:
- Oven less than 10 years old
- Temperature offset less than 50°F
- All other functions work properly
- Calibration cost under $200
- No other major repairs needed
Consider Replacement If:
- Oven more than 15 years old
- Multiple components failing simultaneously
- Repair costs exceed $400-$500
- Energy efficiency concerns (older models waste 25-40% more energy)
- Temperature cannot be calibrated (offset exceeds ±50°F)
Replacement vs Repair Break-Even:
- New oven: $600-$2,500 depending on features
- If repair costs exceed 50% of replacement value, consider new oven
- Factor in energy savings: new ovens save $50-$100 annually
- Modern features (convection, precision temperature) add value
Prevention and Maintenance
Maintaining Temperature Accuracy
Proper maintenance extends the period between calibrations and prevents premature component failure.
Annual Maintenance Checklist:
- Temperature Testing: Test with thermometer at 250°F, 350°F, and 450°F
- Door Seal Inspection: Check gasket for tears, compression, or gaps
- Hinge Alignment: Ensure door closes properly without forcing
- Temperature Probe Cleaning: Wipe probe with damp cloth, check for damage
- Heating Element Visual Check: Look for warping, cracks, or corrosion
- Interior Cleaning: Remove food debris and grease that affect heat distribution
- Vent Cleaning: Clear any blockages from convection fans or exhaust vents
- Control Board Inspection: Check for signs of moisture, corrosion, or burn marks
Door Seal Maintenance
Door seals critically affect temperature accuracy. A damaged seal allows heat escape, causing temperature drops of 50-100°F and forcing frequent heating cycles.
Seal Testing:
- Place dollar bill between door and oven
- Close door on bill
- Attempt to pull bill out
- Should require moderate force to remove
- If bill slides out easily, seal is compressed or damaged
- Test at multiple locations around entire door perimeter
Seal Replacement:
- Cost: $30-$80 for replacement gasket
- DIY Installation: 30-45 minutes, straightforward process
- Professional Installation: $100-$150 including parts
- Frequency: Every 5-8 years or as needed
Protecting Electronic Components
Electronic control systems fail from power surges, moisture, and heat exposure. Preventive measures extend component life:
Power Protection:
- Install surge protector on oven circuit (hardwired protection)
- Costs $80-$150 installed, prevents $300-$500 control board failures
- Particularly important in areas with frequent storms or power quality issues
Moisture Prevention:
- Avoid steaming or boiling over during cooking
- Clean spills immediately
- Ensure adequate kitchen ventilation
- Don't use self-clean cycle excessively (creates extreme heat/moisture)
Usage Habits Affecting Calibration
How you use your oven impacts calibration stability:
Best Practices:
- Avoid temperature extremes (self-clean cycles stress thermostats)
- Allow proper preheating (don't start cooking early)
- Minimize door opening during cooking (temperature drops shock sensors)
- Don't slam oven door (impacts sensor positioning and connections)
- Use appropriate rack positions (affects heat circulation)
- Avoid covering racks with foil (blocks airflow, affects temperature readings)
Self-Clean Cycle and Calibration
Self-clean cycles reach 800-900°F, stressing temperature sensors and thermostats. Frequent self-cleaning (more than 4-5 times yearly) accelerates calibration drift and component wear. Use self-clean sparingly and verify temperature accuracy afterward. Some manufacturers recommend calibration check after every self-clean cycle.
Record Keeping
Maintain records of temperature testing and calibration for warranty purposes and tracking calibration drift patterns:
Recommended Records:
- Date of each temperature test
- Temperature readings at multiple settings
- Calibration adjustments made
- Component replacements
- Professional service dates and findings
- Photos of thermometer readings (helpful for warranty claims)
This documentation helps identify gradual drift versus sudden failures and provides evidence for warranty claims.
Frequently Asked Questions
How do I know if my oven temperature is off?
Signs your oven temperature is inaccurate include: baked goods burning or undercooking consistently, longer cooking times than recipes indicate, uneven browning, recipes failing despite following instructions, and visible temperature fluctuations. Use an oven thermometer to test actual temperature versus dial setting for confirmation.
Can I calibrate my oven myself?
Yes, most ovens allow DIY calibration adjustments of ±35°F through control panel settings or thermostat screws. Electronic ovens use digital calibration menus, while mechanical thermostats have adjustment screws. However, if temperature is off by more than 50°F or calibration doesn't fix the problem, professional service is recommended.
What's the most accurate way to test oven temperature?
Use a high-quality oven thermometer placed in the center of the middle rack. Preheat oven to 350°F for 20 minutes, then check thermometer reading. Test at multiple temperatures (250°F, 350°F, 450°F) to identify consistent offset patterns. Professional testing uses calibrated thermocouple probes for precision within ±1°F.
How much does professional oven calibration cost?
Professional oven calibration costs $100-$200 in Toronto, including testing, adjustment, and verification. If thermostat replacement is needed, costs increase to $200-$400 for parts and labor. Temperature probe replacement adds $150-$300. Many repair companies include calibration in diagnostic service calls.
How often should I calibrate my oven?
Check oven temperature accuracy annually using an oven thermometer. Recalibrate when you notice consistent cooking problems, after moving the oven, or if temperature is off by more than 15°F. Heavy users (daily baking) should test every 6 months. Professional calibration typically lasts 1-2 years with normal use.
What causes oven temperature to become inaccurate?
Oven temperature inaccuracy results from thermostat wear, temperature sensor drift, control board issues, heating element deterioration, poor door seals, and electrical voltage fluctuations. Age is a major factor—thermostats drift over time. Frequent temperature cycling and power surges accelerate calibration loss.
Is there a difference between electric and gas oven calibration?
Yes. Electric ovens use electronic sensors and precise digital controls, making calibration adjustments more accurate. Gas ovens rely on mechanical thermostats and flame adjustment, offering less precision. Gas ovens naturally fluctuate 25-50°F during heating cycles, while electric ovens maintain tighter temperature control (±10°F).
Can a bad door seal affect oven temperature?
Yes, damaged door seals cause significant heat loss and temperature instability. A torn or compressed gasket allows heat to escape, forcing the oven to cycle more frequently and creating temperature swings of 50-100°F. Replace door seals ($30-$80) before attempting calibration if you notice gaps or damage.
Why does my oven temperature fluctuate during baking?
Temperature fluctuation is normal as ovens cycle heating elements on and off. Acceptable fluctuation is ±15°F in electric ovens and ±25°F in gas ovens. Excessive swings (50°F+) indicate problems: faulty thermostat, worn heating elements, damaged door seal, or control board issues requiring professional diagnosis.
What's the difference between calibration and thermostat replacement?
Calibration adjusts existing components to correct minor temperature offsets (up to ±35°F). Thermostat replacement is necessary when calibration cannot fix the problem, temperature is off by 50°F+, or the thermostat is mechanically damaged. Replacement costs $150-$400 versus $100-$200 for calibration alone.
Will calibrating my oven void the warranty?
DIY calibration through manufacturer-approved control panel menus does not void warranties. However, opening the control panel or adjusting internal components may void coverage. Check your warranty terms before attempting calibration. Many manufacturers require professional service for warranty-covered calibration work.
Professional Oven Calibration Services
Nika Appliance Repair provides precision oven calibration using certified test equipment. Our technicians ensure your oven maintains accurate temperatures for perfect baking results.
Call (437) 524-1053Same-day service available • All oven brands • 1-year warranty on calibration
About the Author
